
Tracking and detecting suspicious activities is one of the hardest duties for security personnel and systems. If a security system fails in a facility like an airport or bank, robbers can rob at gunpoint. Out of terror, the victims are typically unable to call the authorities in time for rescue.
But if a smart camera could identify any suspicious behavior and automatically trigger an alarm to call the authorities, such criminal acts are expected to drop dramatically. So, let’s examine how to make such an alarm.
Training the camera
Create a machine learning (ML) model with datasets of everyday behaviors, like walking, talking, reading, and sitting. Feed the ML model datasets of suspected activities such as fighting, boxing, pointing a pistol, and any other violent movement deemed suspicious.
Author’s prototype
Perform the above actions in front of the smart camera to capture a variety of gestures. This will aid in training the machine learning (ML) model and deploying it as an artificial intelligence (AI) camera on Raspberry Pi.
TensorFlow, Google Teachable, Edge Impulse, and Loboto are a few flexible solutions for creating and training an ML model. Any of these options may be selected for the project. Here, Google Teachable is utilized to show.
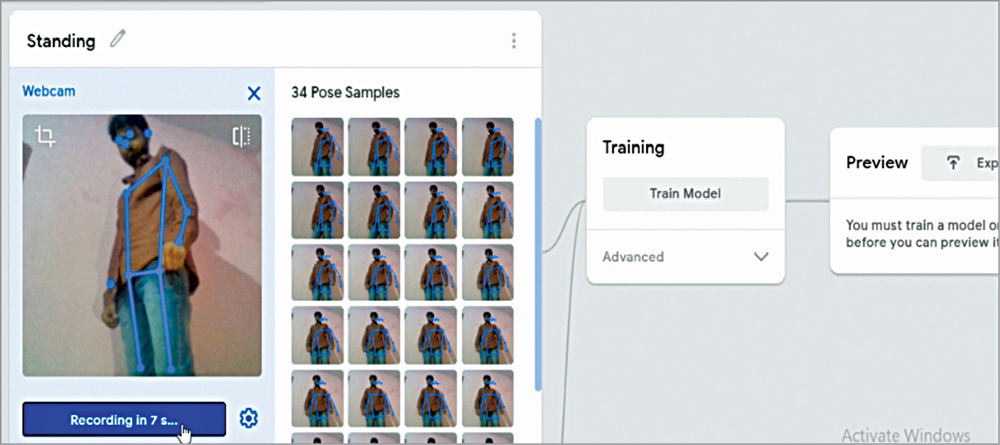
Feeding the normal activity datasets to create ML model
Select the PoseNet option in Google Teachable to accurately monitor numerous body movements and actions. Correctly identify the actions performed previously, such as walking, talking, eating, etc. These datasets should be fed into the ML model. In a similar manner, appropriately classify and feed the datasets of activities such as gun pointing, gun shooting, fighting, beating, etc.
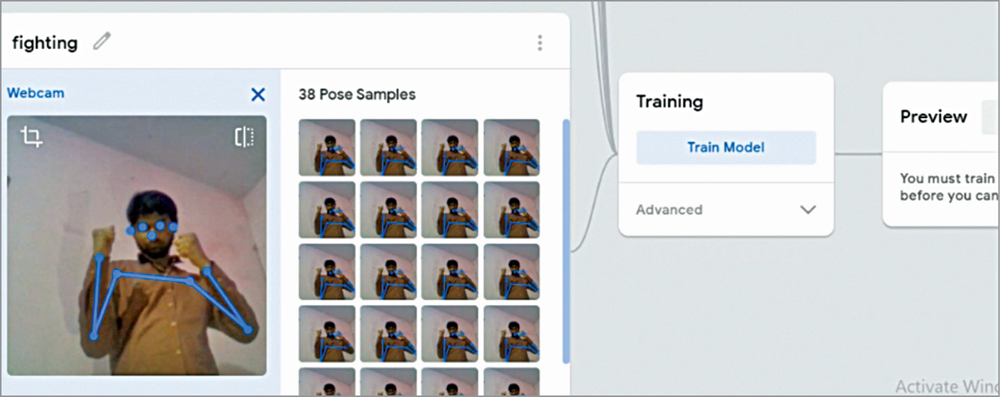
Feeding suspicious activity datasheet
After providing the necessary datasets, click the Train Model button. The option to export or upload the ML model to the cloud will become available. The ML model was uploaded to the cloud for safe storage and so that users may access and deploy it from any location.
After uploading the ML model to the cloud, you will receive a URL for using it. The URL of the ML model that the author built.

Getting the ML trained
Deploy the machine learning model on the camera and add a speaker so that when any suspicious behaviour is identified, the Raspberry Pi will sound an alarm.
JavaScript code
Coding
To deploy the machine learning model on Raspberry Pi, coding is necessary. While uploading the ML model, you would have received a code snippet as an example. It should be copied and pasted into your JavaScript (JS) code. JS coding and testing can be performed using any offline or online code editor. The camera can be named in HTML for the ML model.
Code for setting a path of sound to play
Import the previously uploaded machine learning model to the cloud. Check whether the ML model detects actions such as beating, gunfire, and gun possession during video processing.
Code for play alert sound
The model assigns probabilities ranging from 0 to 1 for the occurrence of a certain action. Therefore, using a “if” condition, if the output is bigger than 0.98, it indicates that the individual is either pointing a pistol or fighting. At this point, an alarm is activated to inform nearby individuals.

Testing and output of the camera
Testing
Save the JavaScript code into an HTML file and open it in any browser that supports JavaScript. Click the Start button and engage in the suspicious behavior before the camera. The machine learning model will attempt to recognise it and will send an alert if it is not normal. Additionally, you can implement functions that automatically phone or text the police.

Testing in .js online editor and compiler
Chrome on Raspberry Pi occasionally fails to open or access the camera and hangs. Try installing the newest version of Chrome, switching to another browser such as Firefox, or utilizing an online/offline.js compiler. If the problem persists, you can utilize the URL of the trained machine learning model to view the output directly.
Testing camera using URL of trained ML model
If the browser cannot access the camera to test the Rpi-created machine learning model, you may also upload files using the Files option.

Testing ML model through manual file input
Download Source Code
Conclusion
Hope this blog helps you to understand how to design an AI Camera For Tracking Suspicious Activities. We, MATHA ELECTRONICS will come back with more informative blogs.