
How to install ubuntu MATE 16.04.2 LTS and ROS Kinetic on Raspberry Pi.

In this blog, we will discuss How to Install Ubuntu MATE 16.04.2 LTS and ROS Kinetic on Raspberry Pi.
Step1: Download the image for Ubuntu MATE
Ubuntu MATE for Raspberry Pi is available for download at https://ubuntu-mate.org/download/. It comes as an XZ archive, so extract the IMG file with 7 Zip.
Step2: Download and Install Win32 Disk Imager
To install an operating system on a Raspberry Pi, you’ll need to write the image file to a micro SD card on another computer. You must be able to use an inbuilt or external USB reader to mount a micro SD card onto the computer.
- Insert your micro SD card and launch Win32 Disk Imager.
- Select your extracted Ubuntu Mate IMG file and change the Device to the drive letter of your micro SD Card.
- Click Write to begin the process.
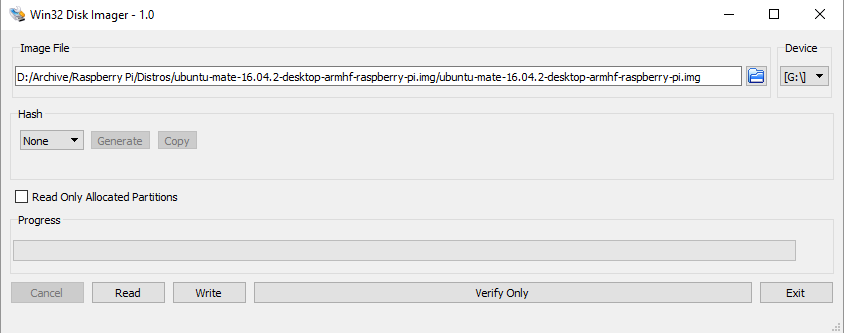
- The graphic will take roughly 10 minutes to write.
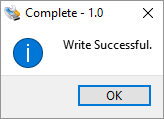
In Windows, safely eject the device, then plug it into the Raspberry Pi 3 and turn it on.
- Using an HDMI cable, connect the Raspberry Pi to a monitor or television.
- Click Continue after selecting English as the language.
- Click Continue after selecting “I don’t want to connect to a wireless network right now.”
- To configure the timezone and system locale, click Continue after selecting an appropriate place on the map.
- Click Continue after selecting an acceptable keyboard layout.
- Enter a suitable Name, Username, and Computer Name, followed by a password. Click Continue after selecting “Log in automatically.”
- The system will now be configured by the installer.
- The splash screen below will appear once the configuration is complete.
- Select Preferences – Internet and Network – Network Connections from the System Menu in the top left corner.
- Under Ethernet, select “Wired connection 1” and click the Edit button. At the top, select the “IPv4 Settings” option.
- Manual is selected from the Method drop-down list.
- Enter the Gateway address, an IP address, and a Netmask in CIDR notation. Enter the DNS server IP for your network. Save the file. To finish, click Close.
.
How to Install ROS Kinetic on Raspberry Pi 3 (Ubuntu Mate)
Only a few hardware designs are ROS compatible. In terms of hardware, the Raspberry Pi is one of the development boards that are compatible with ROS. As a result, I decided to install ROS Kinetic on a Raspberry Pi 3 that was running Ubuntu Mate. However, only one version of Ubuntu Mate is compatible with ROS and the Raspberry Pi 3; this is the Ubuntu MATE for the Raspberry Pi 3 version. This is an OS version that was published last year and includes support for the Pi 3’s WiFi and Bluetooth modules.

Ubuntu MATE 16.04.2 is the operating system that I run on my Raspberry Pi 3. I’m using the ROS version. Kinetic Kame is the ROS version I’ve installed. Kinetic was introduced at the beginning of the year and is compatible with Ubuntu Mate 16.04. This variation appealed to me for two reasons:
- it will be officially supported for the next five years;
- it is the most complete version after Indigo;
Mate is the first step in installing ROS on the Raspberry Pi 3. Mate is Ubuntu’s desktop environment. The installation of the operating system is straightforward. I followed the instructions on the download page and had a Pi 3 running Ubuntu Mate in minutes. The steps to install ROS Kinetic on the Raspberry Pi 3 are listed below.
Step1: Go to System -> Administration -> Software & Updates
Step2: Check the checkboxes to repositories to allow “restricted,” “universe,” and “multiverse.”
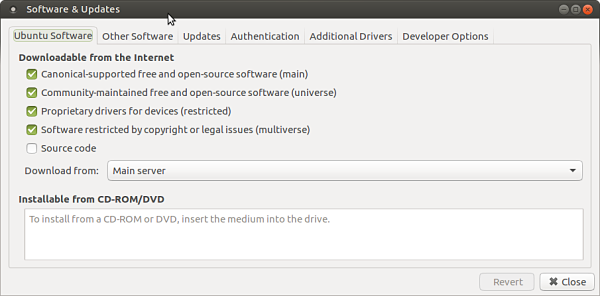
Software and Updates
Step3 : Setup your sources. List
| sudo sh -c ‘echo “deb http://packages.ros.org/ros/ubuntu $(lsb_release -sc) main” > /etc/apt/sources.list.d/ros-latest.list’ |
Step4: Setup your keys
| wget http://packages.ros.org/ros.key -O – | sudo apt-key add – |
Step5: To be sure that your Ubuntu Mate package index is up to date, type the following command
| sudo apt-get update |
Step6: Install ros-kinetic-desktop-full
| sudo apt-get install ros-kinetic-desktop-full |
Step7: Initialize rosdep
| sudo rosdep init rosdep update |
Step8 : Setting up the ROS environment variables
| echo “source /opt/ros/kinetic/setup.bash” >> ~/.bashrc source ~/.bashrc |
Step9 : Create and initialize the catkin workspace
| mkdir -p ~/catkin_workspace/srccd catkin_workspace/src catkin_init_workspace cd ~/catkin_workspace/ catkin_make |
Step10 : Add the catkin_workspace to your ROS environment
| source ~/catkin_workspace/devel/setup.bash echo “source ~/catkin_workspace/devel/setup.bash” >> ~/.bashrc |
Step11: Check the ROS environment variables
| export | grep ROS |
The setup looks like in the picture
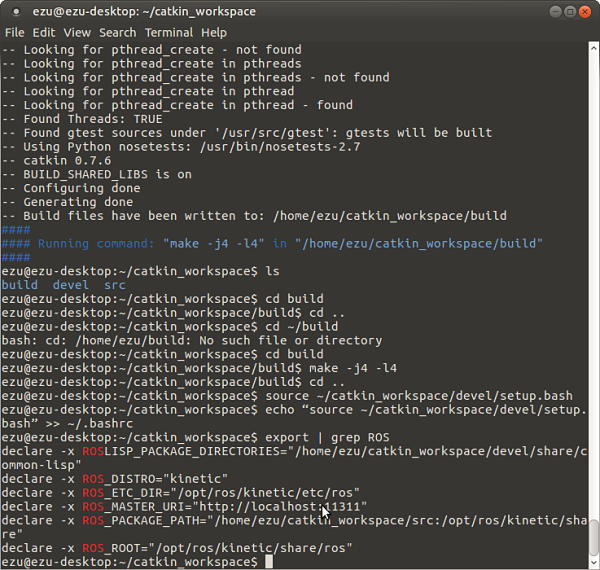
Check the ROS Installation
- Open a new terminal and type: roscore
- Open a new terminal and type: rosrun turtlesim turtlesim_node
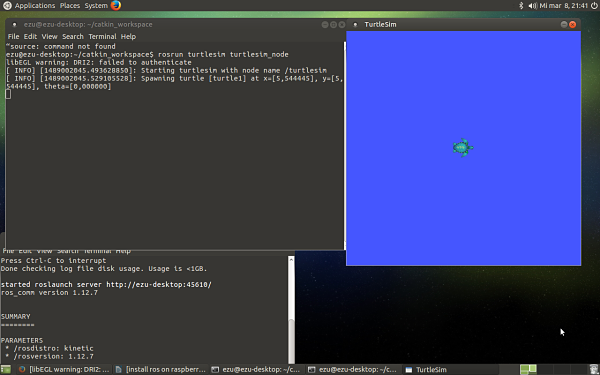
Testing Rplidar
- ### Create a ROS Workspace
mkdir -p ~/catkin_ws/src cd ~/catkin_ws/src catkin_init_workspace
- ### Clone the ROS node for the Lidar in the catkin workspace src dir
git clone https://github.com/robopeak/rplidar_ros.git
- ### Build with catkin
cd ~/catkin_ws/catkin_make
- ### Set environment when the build is complete
source devel/setup.bash
- ### Launch demo with rviz
Check the authority of rplidar’s serial-port : ls -l /dev |grep ttyUSB Add the authority of write: (such as /dev/ttyUSB0) sudo chmod 666 /dev/ttyUSB0 Start a rplidar node and view the scan result in rviz. $ roslaunch rplidar_ros view_rplidar.launch #for rplidar A1/A2 Start a rplidar node and run rplidar client process to print the raw scan result |
Result
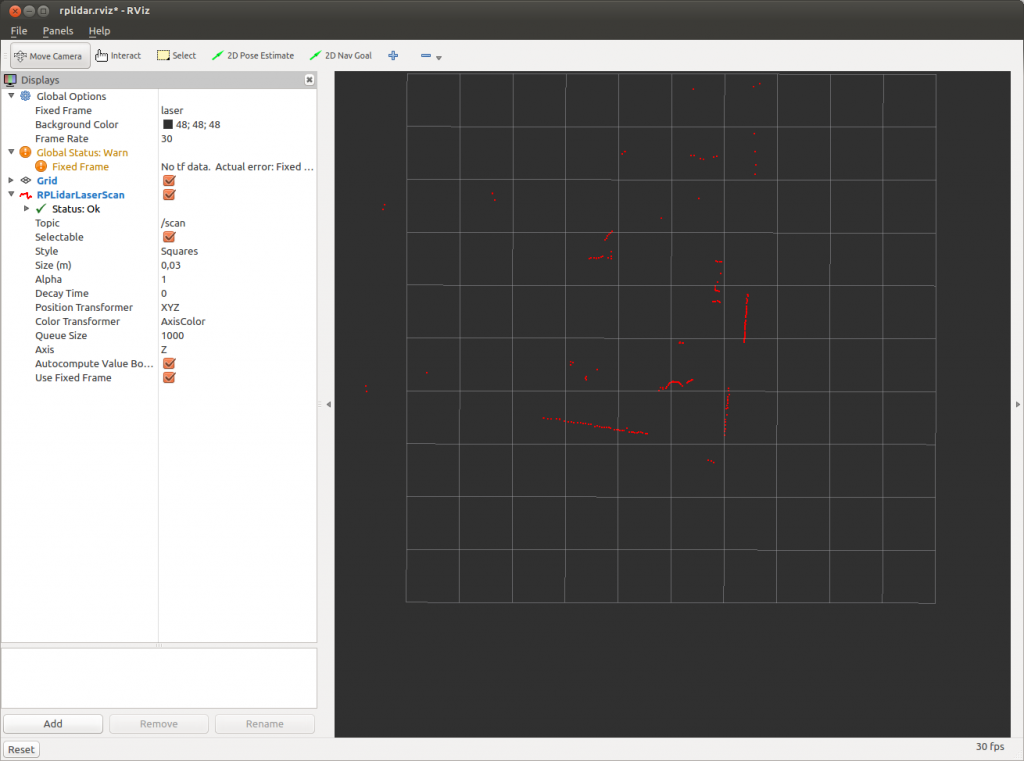
Rviz will appear and display a grid as a background. The laser scanner’s “view” will be highlighted in red. The laser scanner is in the middle of the grid, with a range of around 15cm to 6 meters, so you’ll be able to see everything within that range on its scanning plane.