
BMP180 Pressure Temperature Monitor on Thingspeak with ESP8266
In this project, BMP180 Barometric Pressure Sensor will be interfaced with NodeMCU ESP8266 and OLED Display. Temperature, Pressure, and Altitude values will be displayed on both the Serial Monitor and 0.96″ OLED Display. We will then publish these values via IoT Cloud to Thingspeak Server.
The Bosch BMP180 barometric pressure sensor is used for weather forecasting, detecting altitude, and measuring vertical velocity. It can measure ambient temperature, absolute and relative pressure, and estimated altitude.

The atmospheric pressure, commonly known as barometric pressure, is the force exerted by the weight of air on the surface of the Earth. Due to the fact that the air in the atmosphere has mass, gravity causes the weight of that column to apply pressure on the surface. The BMP180 provides pressure readings in SI units of Pascals. The pressure can also be measured in hectoPascals (hPa) or millimeters of mercury (mm of Hg).

In this IoT project, the BMP180 Barometric Pressure Sensor will be connected to the NodeMCU ESP8266-12E Board. We will display meteorological parameters such as Pressure, Temperature, and Altitude using a 0.96-inch I2C OLED Display. Then, we will transmit this data/parameters to Thingspeak Cloud Server over the internet.
Hardware Required
| S.N. | COMPONENTS NAME | DESCRIPTION |
| 1 | NodeMCU | ESP8266-12E Board |
| 2 | BMP180 Sensor | BMP180 Barometric Pressure Sensor from Bosch |
| 3 | OLED Display | 0.96″ I2C OLED Display |
| 4 | Connecting Wires | Jumper Wires |
| 5 | Breadboard | – |
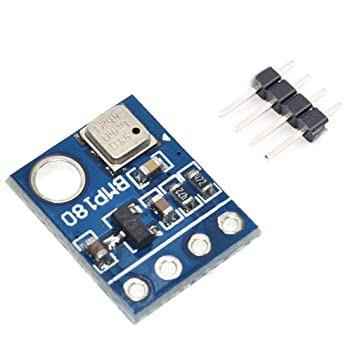
BMP180 Barometric Pressure Sensor
The BMP180 Breakout is a barometric pressure sensor with an I2C (“Wire”) interface.
Barometric pressure sensors assess the surrounding air’s absolute pressure. This pressure changes depending on the climate and altitude. You can monitor weather changes, measure altitude, and perform any other jobs that require an accurate pressure reading, depending on how you interpret the data.
How Does Barometric Pressure Sensor BMP180 Operate?
The BMP180 is a pressure-detecting piezoresistive sensor. Piezoresistive sensors consist of a semiconducting material (often silicon) whose resistance varies when a mechanical force, such as atmospheric pressure, is applied.
Because temperature affects the density of gases like air, the BMP180 measures both pressure and temperature. At higher temperatures, the air is less dense and hence exerts less pressure on the sensor. At colder temperatures, the air is more thick and heavier, exerting greater pressure on the sensor. The sensor employs real-time temperature data to adjust pressure readings for variations in air density. The temperature reading is taken first, followed by the pressure reading.
BMP180 Pins
| Pin Name | Description |
| VCC | Connected to +5V |
| GND | Connected to ground. |
| SDA | Serial Data pin (I2C interface) |
| SCL | Serial Clock pin (I2C interface) |
| 3.3V | If +5V is not present. Can power module by connecting +3.3V to this pin. |
On a PCB with a 3.3V regulator, I2C level shifter, and pull-up resistors on the I2C pins, the sensor is installed. This board is 5V compatible; a 3.3V regulator and an i2c level shifter circuit are included so this sensor can be securely used with 5V logic and power.
The Sensor has four pins, which are VIN, GND, SDA, and SCL. Connect the microcontroller’s VIN pin to the 5V/3.3V voltage pin, GND to ground, SCL to I2C Clock, and SDA to I2C Data.
BMP180 Module Features
- Can measure temperature and altitude.
- Pressure range: 300 to 1100hPa
- High relative accuracy of ±0.12hPa
- Can work on low voltages
- 3.4Mhz I2C interface
- Low power consumption (3uA)
- Pressure conversion time: 5msec
- Potable size
BMP180 Module Specifications
- Operating voltage of BMP180: 1.3V – 3.6V
- Input voltage of BMP180MODULE: 3.3V to 5.5V
- Peak current: 1000uA
- Consumes 0.1uA standby
- Maximum voltage at SDA , SCL : VCC + 0.3V
- Operating temperature: -40ºC to +80ºC
Interfacing BMP180 Sensor with NodeMCU ESP8266
Now let’s interface NodeMCU ESP8266 with the BMP180 Barometric Pressure Sensor.

Connect the Nodemcu ESP8266 VIN pin to the 3.3V voltage pin, GND to ground, SCL to D1, and SDA to D2.
Interfacing BMP180 Sensor with NodeMCU ESP8266 & OLED Display
Add an additional OLED Display to the Circuit. The SSD1306 I2C OLED Display will be utilised. Connect its SDA and SCL pins to NodeMCU’s D2 and D1 pins. The circuit is illustrated below.

Conclusion
I hope all of you have understood how to interface BMP180 Barometric Pressure Sensor with NodeMCU ESP8266 & OLED Display. We MATHA ELECTRONICS will be back soon with more informative blogs soon.