
STM32 Discovery Kits from STMicroelectronics are a low-cost, all-inclusive solution for analysing STM32 MCUs. The kits offer the infrastructure required to demonstrate particular device properties. A HAL library and many software examples enable you to take use of device capabilities and extra values. Extension connections provide access to the majority of the device’s I/Os and allow the attachment of add-on devices. The kits, which have an integrated debugger/programmer, are great for prototyping.
STM32F407 Discovery Board
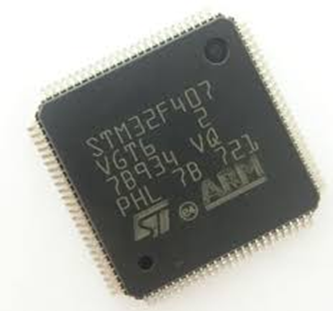
STM32F407 Discovery Board is designed as a development board that is similar to Arduino in terms of advanced capabilities and accessibility. The STM32F407 Discovery Board enables the development of high-reliability applications by utilizing an advanced performance microcontroller known as the Arm Cortex-M4 32-bit core. I’m assuming you’re familiar with ARM Architecture. It provides versatility and customization, allowing you to experiment with libraries, communication protocols, GPIO pins, and so on.
STM32 is an STMicroelectronics series of 32-bit microcontroller integrated circuits. The STM32 chips are classified into series based on the same 32-bit ARM processing core, such as the Cortex-M33F, Cortex-M7F, Cortex-M4F, Cortex-M3, Cortex-M0+, or Cortex-M0. Each microcontroller contains a processing core, static RAM, flash memory, a debugging interface, and a variety of peripherals.
They include the components required to showcase certain device functionalities, such as MEMS microphones, sensors, and LCD screens. The exploration kits are suitable for prototyping since they include a HAL library, several software samples, and an integrated debugger/programmer.
STM32 Evaluation boards offer all of the external hardware required to use the full feature set of an STM32 Microcontroller. STM32 Eval boards provide access to all microcontroller pins, allowing them to be used as a reference design for application development.
STM32 Nucleo boards enable design engineers to experiment with new ideas and quickly produce prototypes using any STM32 MCU. All Nucleo boards have ArduinoTM connections as well as STMicroelectronics’ Morpho connectors, enabling for simple hardware expansion. Users of the STM32 Nucleo may use the mbed online compiler, the mbed online C/C++ SDK, and the developer community at mbed.org for free. Create a comprehensive application in a matter of minutes.
Features:
- The core unit consists of Arm® Cortex®-M4 32-bit processor.
- Supports FPU and DSP instructions for high speed.
- Have a 100-pin LQFP package.
- Uses ST-LINK/V2 embedded debug tool for programming and debugging.
- Built-in 3-axis accelerometer and Omni-directional digital microphone.
- Built-in audio DAC along with class D type speaker driver.
- Consist of a total of 8 LEDs, of which 4 are User LEDs.
- Consist of user and reset pushbuttons.
- Support wide range of IDEs
- Flexible power supply options.
- Core operates at a frequency of 168MHz
- Seven channel matrix AHB bus for fast switching.
- Support I2C. SPI, as well as UART modes for communication.
- Low power operation.
Hardware Connections:
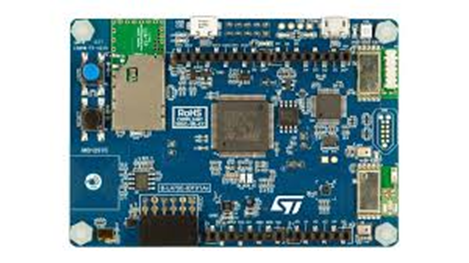
The board, as seen in the image below, has a Power LED, an audio jack, a Micro USB port, SWD (Serial Wire Debug), a Mini USB ST-Link debugger, user and reset buttons, header pins, a crystal oscillator, and four user LEDs (Red, Orange, Blue, and Green), among other things. The board is made up of header pins that are attached to the core’s five ports, namely A, B, C, D, and E.
To begin, connect the board to the computer with a USB type A to Mini B cable. This cable is attached to the board through a USB connection CN1. The four user LEDs begin blinking one by one. The MEMS sensor programme is preinstalled on the STM32 DISC board. As you press the user button on the board, the sensor will enable. When you tilt or move the board, the LEDs represents the direction and speed of movement.
Development environment
System requirements
- Windows® OS (7, 8 and 10), Linux® 64-bit, or macOS® (a)
- USB Type-A or USB Type-C® to Mini-B cable used to power the board (through USB connector CN1) from host PC and connect to the embedded ST-LINK/V2 for debugging and programming
Additional hardware accessories will be needed to run some applications:
- USB type A to Micro-B’ cable, used to connect the board (through USB connector CN5) as USB Device to host PC
- Headphone with male jack connector
Development toolchains
- IAR Systems – IAR Embedded Workbench® (b)
- Keil® – MDK-ARM(b)
- STMicroelectronics – STM32CubeIDE
Running Procedure:
The demonstration firmware is placed in the board’s Flash memory. To run it, follow the instructions below:
- Check the location of the jumpers on the board, JP1 on, CN3 on (Discovery selected).
- To power the STM32F4DISCOVERY board, connect it to a PC using a ‘USB type A to Mini-B’ connection and USB connector CN1. The red LED LD2 (PWR) then illuminates.
- Between B1 and B2, four LEDs are flickering.
- Press User Button B1 to enable the MEMS sensor, then move the board and watch the four LEDs glow in accordance with the motion direction and speed.
- When a second ‘USB type A to Micro-B’ cable is connected between the PC and the CN5 connection, the board is recognised as a regular mouse, and its motion controls the board as well.